9/1/11

If you build it, they will come

We moved into the condouse in February of 2009. Since then we have had 1 guest stay with us. Yes, just one. It wasn't even our guest, it was our old roomies guest back when our house had 3 instead of 2. (I am starting to think that 2 really is the loneliest number, because I miss a house that is full and filled with laughter and talks.)

If you will remember a post or two ago I complained that the roomie moving out left us again with a creepy empty room and I set out to turn it into a guestroom/ lounge area that we could hang out in. I thought it would mainly be used for lounging, as our guest-record is rather depressing. (With both Jeff's and I's parents in town, we rarely have the need to house guests and usually have people stay with the 'rents.)
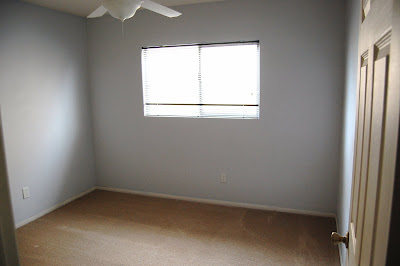

However, the old roomie had her reception in town and with the reception came the need to house guests! Yes, they still aren't really our guest, but guests none the less, and I was happy to take them in. Happy too that the weekend of the reception gave me a deadline to complete my latest project. Otherwise my guestroom challenge could linger for months, much like some of my other recent projects (link paint or posting this about 3 months after finishing our spare room).

I also mentioned in the post of long ago that I was going to try decorate the space for free, or next to it. This was not a glamorous make over, but this is what I had to work with - basically, nada. So I went shopping around the house to see if I could find some useful items to fill the space.


Our garage housed a couple of old dresser drawers and an old side table that I use to use as a night stand.


I also found some old pillows and curtains from our first house, or maybe even my college days? Not sure, but they are old buys from Pier One. With my dresser drawers in the garage, my old side table and a stained pineapple lamp I figured I had all the makings of new room- haha.


I took the dresser drawers and decided they were going to be mounted to the walls to create my new shelves. I wanted some way to spice them up and modernize them, so the room looked a little more current and less like stuff from my garage, so I grabbed some paint we had on hand and I hunted down a cool painting tutorial on the web. Over at Kelly and Olive they have a great Chevron Painting tutorial that I used to paint the backs of my drawers. I wont get into it here, because really their tutorial is great.


The next garage transformation was for that sad side table that I use to use for a nightstand. I decided to unscrew the top part of the table and was left with something more like a stool. With my new little stool I grabbed an extra pillow we only ever use for road trips, a couple of rarely warn scarves, a stapler, and tape. Tools in hand I transformed this little bad boy into a kind of ottoman or coffee table. I just plopped the pillow on top for batting, wrapped the scarves around the top and staples and taped the bottom to make it tight and secure.


In a couple of weeks I had everything together and had my very own, nearly free room re-do!


The desk use to live in our office, along with the side chair. The Strokes poster was one of Jeff's old posters, as is the guitar. The TV was ours, it was just being stored at his brothers house until we had a need for it. We still have the old futon (on the far right side of the room), but thanks to Jeff's sisters letting us switch out our old broken frame for their totally intact frame, it's no longer an issue.

The only part of the room make over that cost us some mula was the closet doors. We found them at the Habitat for Humanity store for $25 a piece. I thought that was pretty expensive for closet doors, but after weeks of looking for cheaper ones on Craigslist that matched all of our other doors in the house, I kind of gave in. I think it was an okay buy, plus it's reused, so that is a plus.


The mirrors were something I bought from Ikea years ago that I had never even opened. The blue vase in the corner was from our old apartment. My favorite part, however, ended up being my dresser drawer shelves.


The beyond cute giraffes are from my grandma. She has had them for years, and hearing me say how much I loved them a few months ago, decided to give them to me for my birthday. I absolutely love my giraffes! I think they will look so great in our nursery one day, and since this room will be the nursery, it's only appropriate that they live there now too. (The picture is of our old roomie, who is a frequent guest in the room now with her hubster.)


One of my other favorite parts of the room is this great chevron woven tray. I had bought 2 of these at Salvation Army for $2 total a few months back. The other matching tray is on my nightstand corralling all my books. I saw almost the exact same trays a few weeks later at Pier One for $15 a piece- good buy Amber!


On my new favorite tray I put a couple of books that are fun to peruse through and don't require any real reading. Hopefully this can entertain our guests with some late night laughs. On my books is a small wood stick game and a harmonica for entertainment as well (although I hope they actually don't use the harmonica- we use it all the time- so that could be some weird germ action going on.) The small pink depression glass bowl is from a previous co-worker and can be used to store guest jewelry and whatnot.


Luckily I had a couple scarves on hand that matched the old school desk that is being used as a TV stand. The color is so bold that I find I don't wear them as often as I should, so I think they will get more use out of being a temporary ottoman for a while.


My old pineapple lamp was spray painted white and the shade was recovered with fabric I had on hand. Because of the odd shape of the shade I had a little trouble and I may need to tidy this up a little bit, but it works for now. The room will work for the temporary time its needed. I think I may add our brown rug that we have downstairs once we get that upgraded to a nicer one, but the whole thing is pretty good to go. We have had a handful of overnight guest since it's completion and it works great.

And for BONUS JONUS points I even tackled more of the hallway that leads to the new guest/chill space. I have all of these paint samples from trying to choose the right gray for the hallway and decided to put them to good use.


I stumbled out into my messy garage again and found my spare picture frames. I didn't think I had enough so I went to the Salvation Army and bought a few more frames to make a good sized grouping.


I laid them out to envision how it would look on the wall, and then decided what frames would be painted what color of test paint. When I was all done I ended up with this:


I mostly used art and pictures that we had on hand. The largest picture is of the Eiffel Tower that I picked up when I was in Paris. The dried flowers are from our wedding. The orange picture is of the Nauvoo Temple that my little sister gave me as a gift.


The old couple grabbing bums is a card I gave to Jeff. The "I like you a lot" is from Salt and Paper and is a free card printable, I just put it on some stripped paper we had.


I really like my little Nevada cut out with a green heart over Las Vegas. I just made this out of paper we had in the office. I am not 100% sold on how it all looks, but I figure it is my first picture grouping I've tried to do, so it may take some practice. I imagine more black and white photos on this wall some day,but first I have to get picture ready, which might be a while. For now, I will take a work in progress- heck I will just take me getting off my lazy butt and doing something in this house! Especially if it only cost me $50 bucks for closet doors and some change.

8/17/11

Headed for Colorado and Utah

Back in July I headed to Eastern Utah to see my family and we made a quick trip up to Ouray Colorado. I am just getting to it now, because, well, summer seems to fly by and leave before I know it. I had a lot of things planned this summer that are not getting done. This was suppose to be my summer to become a better photographer, and make tons of home improvement. My goals have pretty much crashed and burned- but I still have a week or two to complete them right? Yeah, I wouldn't double down on that bet.

Anyways, I've gotten distracted. I left my hubby and headed out with my mothers family for a quick get-a-way. It was lovely. Once we made the 7 hour trek up to see the family, we left the next day to go to Ouray Colorado. I had not been here since college and it was good to be back. B.E.A.U.T.I.F.U.L.

Enough said.

If you have not traveled here before, be fore warned. The road to get there is crazy fun, and just a little plain crazy. Not fun at all if you get car sick, as some of my cousins did in our van. But, it is was a good view, even if it was right next to a cliff the whole time without any rails.


Once we got there we went swimming in the hot springs (yea, not going to post a pictures of that).

We Picnicked,

we went walking around town ,


we went shopping,


We hung out at our rented cabin,


We went to visit box falls,


and then our quick little journey to Colorado was over :( But we still had a ton fun back in Utah.

We went swimming again up at dry lake while my cousin played with his new fishing boat,


(I love this picture. not only does it show how pretty it is up by my grandparents cabin, but it also says a little something like " I'm a hick and proud of it." Makes me smile and giggle a little.)


we saw crazy tiny toads,


and even went 4wheeling. Sadly my camera was out of batteries by the time we got to this part of our journey, but I think I took some video. My camera batteries died because somebody decided to have a little photo shoot, but that is okay.

It was such a lovely extended weekend. I love getting out and playing in the muck and mud and just having a great time with my family. I am so glad I went, and I vowed to myself that next time Jeff comes up to visit my family with me, that we will go to Ouray again. Can you believe that boy has never been to Colorado?

7/19/11

I've Got Wood

On a recent family vacation to eastern Utah I took the opportunity to find myself some reclaimed wood. Why you may ask? Well, it's because I have been drooling over this picture I found on Pinterest for the past few months.

It's a beauty right? I love everything about it. The rustic wood, the modern metal chairs, the string lights. I knew I wanted to re-create something similar for our own patio/backyard. I tried to find a salvation yard in LV, but the only ones I found are open to people with a construction licenses. Boo on them! So, luckily my Uncle hooked me up with some old, rustic, gray wood while on vacation.


My family must have thought I was insane lugging it back with me for the 7 hour drive, but it was worth it to me. Now we have a pile of wood in the garage and we need to figure out how to make ourselves a table!


At first I thought this gorgeousness was just out of my reach because I couldn't find chairs that I'd be able/willing to throw down the Benjamin's for. I found similar chairs at Overstock.com, but they were over $100 a chair (That is over $400 buck for the 4 chairs I want). I just couldn't pull the trigger on something that would cost so much. Then I found another great inspiration photo on Young House Love.

These ladies also found their chairs on Overstock, but these babies were just around $200 for 4 chairs. They even come in a variety of colors like black, red, and white. This is still pretty expensive for me. But I have talked myself into it by saying that I would spend more than that on 4 quality outdoor chairs, and these will fit our small space even better because they are stackable. Now, the hard part. Making the table.

I found this cool little tutorial on Apartment Therapy and I'm sure I'll turn to google for all the 'how to's' when we get down to building the table itself. I also like how they used Vika Lerberg legs from Ikea. It seems like such a simple solution. I'd even like these spray painted in a cool color, like a bright red or yellow. (I don't mind getting a little more adventurous with color outside for some reason.) Plus it seems like a good price at only $30 buck for the pair with shipping.


I found this table on Pinterest too. I L.O.V.E the painted turquoise legs. They are amazing. I am just not sure if I would be able to re-create this. First, I'd have to find a cheapo table on Craigslist with amazing legs. Second, I'd have to be able to take it down to the right measurements for our space. Third, I'd have to figure out how to paint and sand down the legs so they look all rustic like. I do not know if I have that much faith in my faux painting abilities. But this is still one of my top choices for some sexy backyard table legs.
This beauty I found on Pinterest as well. I really like the clean lines but think it may be a little too modern for the look I am going for. It reminds me of something I would find in West Elm (which I love, just maybe not for our rustic table). The other plus with these legs is I think that they would not be very intrusive and leave plenty of swinging room for our legs.
Lastly, these hairpin legs are probably my top choice. I found these hairpin legs online for only $18 a pop at 28 inches tall. I love them. They read rustic, retro, and simple to me. But even though I love them, I'm still a little hesitant. I know I got the wood for free and all, but $72 bucks plus shipping seems like a lot for table legs. Especially when I have to pay for the chairs too. I'd really have to make sure the table was made correctly and would stand the test of time if I was going to put that kind of money into it.


It will still be a while until we get cracking on the table anyways, so we'll have some time to think about it. I do not want to try and bust this thing out in 108degrees this summer. I plan to start the tables construction around September. (Or, I guess I should say I'll start asking Jeff to make this starting in September.) If anyone still reads this blog would you mind letting me know which one if your favorite? I know I'm going to be pretty indecisive on this one.

7/6/11

How to: Nursery on a budget 2

Cont ... Fourth tip: SEW IT

I know my friend is a great seamstress, but there are really easy tutorials on how to make your own crib skirts if you are novice like myself. Like this one. You can make pillows and all that jazz.

My only "resourceful" type tip is to think about what you are using for fabric. You can go get pretty cute fabric for around $2 but why not shop the house first? I have recovered stuff in my old clothes, a great scarf I was never brave enough to wear, old blankets, tea towels, whatever I feel like. Some of my favorite pillows had a previous life as a napkin. Or I've always thought about making a baby changing cover out of those great table clothes in Home Goods. If they can stand up to messy food maybe it would be able to stand up to other types of messes- haha.


Finding cheap fabric doesn't mean you have to recover everything in your old clothes either. There are also great newly purchased ideas for fabric as well. If you have a shorter window in your room you can take one curtain panel, cut it down the middle, sew a hem on the cut edge, and make 2 curtain panels for the price of one. You can even turn sheets into curtains for your window. Places like Ross and Home Goods have great prices on nice bedding. You can use the fabric for so many different things.

Fifth tip: ART

I like simple art, and I think that even goes further in a nursery, to have those simple places for your eye to rest. And art I can make at home with some paint or on my computer is gravy. Here are some of my favorite kid proof art ideas:


1- You could totally make simple art on your computer in word with colors to match your nursery. Look at Etsy for great ideas like this. If you want it to have some texture get some grainy paper and then put a really, really thin layer of white washed paint over it. (Or what ever color of wash you want). I did something similar like this for cheap art in our mast bedroom.

You can do this for any words or phrases you like really. I want to do something similar to this with a nursery rhyme my grandma always use to sing to when I was young. Pick quotes that means something to your family. To give it an extra kick, modpodge some fabric or paper on some matting and cut it to size.

2- Temples- At the last GC they mentioned having a picture of a temple in your child's room from and early age. I liked this temple print on Etsy for a babies room. To replicate something similar on your own, print out an outline of your favorite temple on your computer (if you can't find a picture on the web of just the outline, then you can change your printer settings just to "outline"), trace the outline onto a paper or canvass, and then just paint the rest of the negative space around it.

3-Embroidery hoops- Find a 20% off coupon for Michael's or Joannes and pick up a few embroidery hoops. Stretch some cute fabric in it, glue any excess fabric in the back on the inner lining of the hoop, and you have a very cute art installation. You can even use fabric you already used in the room, or again, whatever you have lying around the house.

source found here, with how to.

4- Chinese Lanterns and Tissue Pom Poms- I love it when people use a grouping of Chinese lanterns and tissue paper pom poms, hung at different heights, as a kind of crib mobile. Go to World Market for cheap Chinese Lanterns in a wide variety of colors and visit Martha Stewart for tutorials on pom poms. Sewing a banner also seems to be big lately (I've made a few paper ones for holidays and parties and they are super simple.)


5- Don't want to make it yourself but still need free art? Google free printables for children and find great prints like this. Or visit a website like this.

6- Don't want to make if yourself and have an extra $5-20? GO TO ETSY! I love that place. In the very least, it is great for inspiration (as you can tell from #1 and #2).


Sixth Tip- KNOW WHERE TO SHOP

We all know to go to Ross, Homegoods, Marshalls, etc. They are great and I am so glad Las Vegas has so many of them to choose from. But, there are those little shops that are out of the beaten path which have some of the best deals. Here is my list of where to go.


Antiques:
Charleston Antique Mall 1109 Western Ave.
Not Just Antiques Mart 1422 Western Ave.
Antique Mall of America 9151 S. Las Vegas Blvd.

Second Hand:
Salvation Army 4001 West Charleston Blvd. & 360 N Stephanie St, Henderson
Goodwill 9230 S Eastern Ave # 130, Las Vegas (the one on Stephanie and Warm Springs kind of stinks)
Freecycle

Local finds:
Retro Vegas 1211 S. Main Las Vegas Blvd.
JJ Draperies 1321 South Commerce St. (I think this is it. There is a shop down by Main and Charleston that has upholstery fabric all for $5 a yard. It has moved so many times I am having a hard time finding it lately.)

6/20/11

How to: Nursery on a budget

One of my friends is expecting her first child later this year (HURRAY!). She was stuck when it came to getting the nursery together for her sweet babe on a budget. So, she asked me to chat cheap/resourceful decor with her. Of course I was flattered, but I wasn't quiet sure what kind of sage advice I could offer with me being sans baby or baby bump.

Then, of course, it hit me. My name is Amber and I am a blog stalker. All those wonderfully creative people of the web definitely had their clever tips to share. If there was a support group for blog stalking, I would be member. Whenever I change things up around the house Jeff will ask me "Did one of your blogs tell you to do that?". Sometimes I get to boast that the idea came from my very own pretty little head; but most of the time I explain that "Yes, I was inspired by a blog."

People are so resourceful and have such great ideas. I am glad they take to the internet to share all of their wonderful tips! All those great ideas for copying, I mean for inspiration. So, I stormed my brain and wrote a list of all those things I remember seeing on the great and expansive interweb which would work for completing a nursery on a budget. I thought I would share my list on my blog too. (Sharing my copy catting of blogs on my own blog, what a strange world?) This way if I ever am blessed to have my own little one on the way, I can just come back here and look at what I had to say. (I'm sure by that time I will have other things on my mind, like how could I be this lucky? And how do I have a safe a healthy pregnancy?)

First tip: PAINT

Paint can be cheap, and it can make one of the biggest impact on a room. If you don't want to splurge the $20-$30 bucks it would cost for a gallon of paint (to cover most rooms), why not go with a quart and see where it can get you?


(I just pinned this on pinterest and couldn't track the original source- kind of the point on pinterest- I know.)

You can paint strips on a ceiling or walls. There are even great tutorials for chevron strips or tracing from an overhead projector. Painting your child's initials, or even just one great big band across the room can make big difference.

Source found here


Side note: If painting a babies room, paint with low or no VOC paint. If the color you like doesn't come in no VOC, have Lowes color match it in a brand that does. Even with low VOC it is still suggested to paint the room well in advance of your babies arrival. Think a few weeks before you'll bring the little one home.

Second tip: BUY SECOND HAND

I know most people want everything to be nice, new and clean for their new little baby. And I don't blame them. However, you don't have to buy all their toys from Goodwill, maybe just select pieces of furniture. Find a good second hand store in your area. My favorite is a Salvation Army right by my work (in the ghetto, they usually have the best stuff). It may be scary but it has a great selection of furniture. Not to mention Craigslist, just make sure your hubby goes with you to pick the items up. Ladies who are preggo should not go to strangers homes alone!


Anywho, here is a list of my favorite items to pick up second hand:

1)Picture Frames- This may seem odd, but besides my gigantic picture frames from Ikea in my living room, I don't think that I have bought a new picture frame in YEARS. With a fresh coat of paint you'll never remember it was used. Just look for something sturdy and made well.


2)Rocking Chairs- I almost always see a rocking chair or two at Salvation Army. Spend the $20 on a chair and just recover it. Those old wood rockers have those easy to recover/ easy to replace cushions. Plus you can always paint the wood. (Or if you are pregnant I guess your hubby or friends will be doing all this painting I keep talking about. )

3) Dressers- Old antique dressers are built so much better than anything you could get for a similar price from a big box store. Plus they are usually smaller which would be great in a nursery. Throw a changing pad on top of that baby (the dresser, not your new child) and you can skip the changing table. Since you bought this dresser second hand I bet you wont even mind painting it, or attaching some hooks on the side of the dresser where you can hang baskets full of diaper changing goodness.

Source found here

4) Baskets- Honestly, why do people think that they can charge $20- $30 for a basket? I always get my baskets from Salvation Army. They are like $2. Seriously. And baskets are great for stashing diapers, toys, blankets, whatever you may need.

Okay, so are you still not feeling this second hand thing? Does it give you the heeby geebies? Look here and here for links on great ways to safely sanitize those second hand finds for your little one. And look here for more inspiration for what you can accomplish buying second hand.

Third tip: REUSE


I know- duh. But what I mean is re-use anything you can think of. For instance, I have a plastic bin in my garage full of all my old favorite toys. All those old favorites will be my kiddos first toys. If you are not a crazy hoarder like me, hijack some of your old toys from your parents house.


Go shopping in your garage and see what you can make. Look around your house and see if you can clear off that bookshelf a little and re-use some of the items in your babies nursery. Look at things in a new way. I am always doing this when I want to go buy something new. Before I hand over my credit card I go shopping in my house to see if I can find something else that would work. Usually, I can.


Sorry for the bad picture. (Have I mentioned that my summer goal is to be a better photographer?). But this is me and lil' sis' being resourceful when it came to equipping her with desk organization items when she went into middle school. We painted a sheet of metal and old empty cans of soup with chalkboard paint and wrapped the edges with ribbon for safety. The metal sheet was her now magnetic chalk board and the cups held pencils, rulers, or whatever else she wanted. We re-used an old tin gift card holder to house all of her chalk, and used craft paper and vase beads to make little magnets. Whatever you have around your house can usually handle two to three different jobs. Think outside the box.


. . . Okay. I am getting pretty word-y here but I still have a couple more tips. I will save them for my next post, be back soonish.

6/14/11

PARIS!!!!!!!!!!!!

Have you seen this? The amazing blog Oh Happy Day is giving away a trip to Paris for 7 (yes I said 7) days. Wouldn't this be lovely! You all should try and win!


Pic found here

6/13/11

Amber's Choice

We are finally laying the flooring downstairs, which means I can try and finish what I started months ago - the office. Our old office was burnt orange, white and black, with yellow walls. Every time I went in there I felt like the room was screaming at me. Now with the cool grays and ample doses of white it feels much more serene. So serene it is a bit boring and I need to bring it up a notch.


My starting point is most definately this amazing quilt that my mum-in-law gave us for our wedding. It's black, white, and red - some of the colors we used at our wedding. It is such a nice gift, I want to make sure it has a secure home in the office where it will be safe, rarely used, and we'll still see it every week. I am not a huge fan of just using these three colors for the entire room as the whole color combo though. That reminds me of the 80's for some reason. I want to bring in another dominant color.

My first thought is one my all time favorit color combinations to go with the newly painted walls- Gray and Yellow. I even spotted this table cloth at Target that I would want to make some pillow covers with, or possibly make a slip cover for the office chair. For me there is just no happier color combo than yellow and gray.


Plus, yellow and gray were just ment to be bestfriends. Seriously, they are marvelous together


Picture can be found here.

But this color combo has me thinking- isn't yellow and red the color combo I just tried to get rid of by painting the old yellow walls and changing out my old redish desks? I thought I was going for a cool, relaxing work space. Maybe red and yellow aren't the best way to go.


So when I think of red (or more of a burnt orange is what I am trying to incorporate) what complimentary color comes to mind? None other than blue, my most favorite color. Now, that wouldn't be a bad idea! It would even help tie our downstairs blue living room with the upstairs. Make the flow of the house more cohesive.


After all, red and blue is a very traditional color combo. (The above picture can be found here
) Traditional, classic - Those are definately two styles that I am trying to incorporate into our decor. One of my 30X30 goals is to have our style grow up a bit. Maybe a traditional color combination would play well with the sleek, modern IKEA style we have going on in there so far. Plus I've always wanted to use yellow and gray in a nursery someday. But can I really turn my back on yellow and gray- it's just too cute? Hmmm. I just can't decide. what to do, what to do?